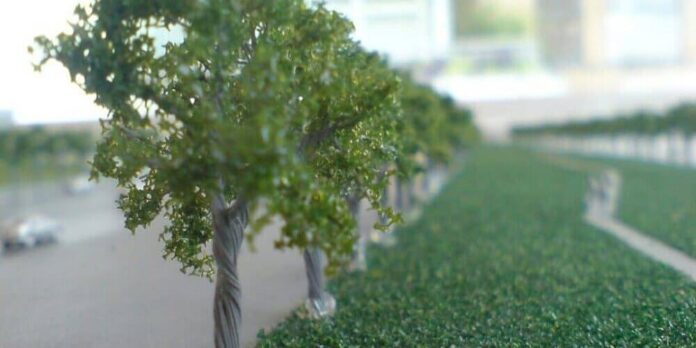
It is often advisable to add relief to a diorama to respect a beautiful composition. But now, a scale tree with a model is often flat. This is why most people have gotten into the habit of adding trees to add height.
How? By learning how to make tree models for architecture. This way, a lot of money will be saved on the seemingly overpriced miniature trees in stores. Scale trees model making is also something you should try.
No doubt, they are quite difficult to make. However, for questions of the density of foliage, realism, branches, there are some ready-to-use in the market even though they are all identical. To learn how to make scale trees yourself, then hang onto this read!
How to Make Scale Trees for Modeling?
The steps to making scale trees are quite simple, but that’s if you can adhere to the strict instructions given!
1. Materials needed
The following are some of the important materials you need to get first if you’re willing to learn how to make this tree.
- Electric wire
- A stripping pliers
- Flocking/ or foam
- Polystyrene base
- Basic pliers
- Filler
- Wood glue
- Painting
2. Preparation of fibers:
- Remove the protective rubber boot using the wire stripper.
- Twist the fibers at one end so you don’t see them going all over the place.
3. Twisting
- Plant your fibers by the twisted part in a polystyrene base or in a vice (which is better).
- Prepare the branches and separate the fibers at various levels.
- Then, start from the bottom of your tree, the trunk, therefore, and start twisting it. As soon as you come across a branch, twist it there. Continue to the top of the tree.
- If your branches are made up of several fibers, divide them again until you have one-fiber terminations.
4. Standardization:
Your trees cannot be painted. This is because the coiled fibers in the general textures of the tree are being perceived. To remedy this,
- Plantyour trees in a polystyrene base.
- Prepare a 50/50 mixture of wood glue and filler. It is a very compact paste, and liquid enough to be applied with care.
- Cover each branch and especially the trunk with this substance.
- Spray the tree with varnish. Because the pulp risks detaching from the fibers wood glue does not adhere very well with metals.
5. Painting:
To paint properly;
- Spray on a black undercoat. If you don’t have a bomb the task may be tedious. Turn the tree over several times to cover all sides.
- Then apply the shades you want with dry brushing
6. Flocking:
This step is quite complicated but it’s doable.
- Take a brush, foam/ or flocking, and wood glue.
- Apply a dot of glue to all the ends of your branches. Then put your foam / flocking there. Try planting your piece of moss / flocking to hold it up better.
- For more convenience, use tweezers when positioning your foam/flocking.
- If your flocking is too fine, dilute wood glue with water. Place some flocking in any container. Pour the diluted and mixed glue.
Conclusion
And there you have it! Making small-scale trees for modeling can be a daunting task if you’re a first-timer. Nevertheless, practicing constantly is what makes you attain perfection at the end of the day.


